Myofascial release for dogs is a rehab therapy that’s getting a lot of attention. The process uses gentle and continuous pressure and stretching to specific areas on a dog’s body to improve mobility and reduce pain.
Pet parents are drawn to myofascial release because, with proper training, much of the treatment can be done in your own home.
I first learned about this holistic therapy during an interview with Dr. Jenny Moe, a former pediatric physical therapist who became a Certified Canine Rehabilitation Therapist. Today Dr. Moe owns Doggon’ Wheels, one of the most highly regarded dog wheelchair companies and she started Moe Love Myofascial Release where she does in-home myofascial release for dogs.
After my interview, Dr. Moe put together a “lesson plan” of myofascial release exercises for pet owners to do with their dog. I added it at the end of the interview story, where unfortunately, it was a bit hidden. So, I decided to post this helpful instruction sheet, front and center in this post. That way every pet owner can take advantage of the information.
First, I want to go over some facts you should know about myofascial release for dogs
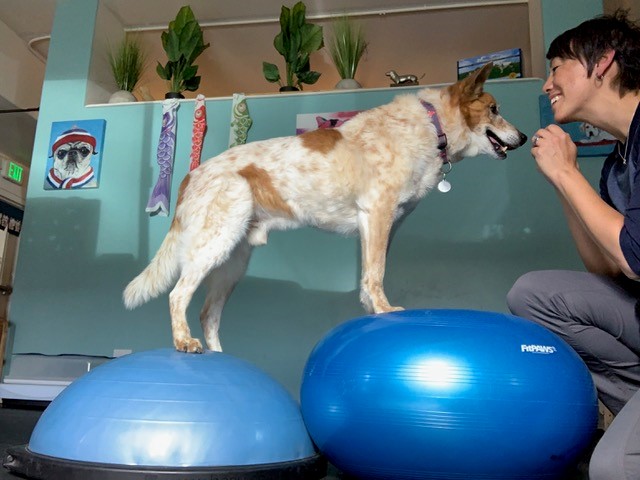
Myofascial release refers to the muscles or “myo” and “fascia,” the connective tissue that lies just below the skin. The fascia covers and connects all of the organs in a dog’s body, along with covering the muscles, bones, nerves, joints and tendons.
In dogs who are healthy, the fascia is smooth and stretches easily as an animal moves. For disabled pups and dogs dealing with conditions like arthritis, neurological disorders or spinal injuries, the fascia becomes dry, tight and painful. It restricts movement.
The goal of myofascial release therapy is to stretch and loosen the fascia by targeting trigger points in the body that hold tension and tightness. With gentle pressure and stretching, myofascial release helps to relax adhesions, improve flexibility and restore elasticity of the fascia.
eBook
Find The Right Dog Wheelchair For Your Pet
Your dog has a mobility problem, and you want to buy a wheelchair. But do you know what kind of cart will work best for your dog’s individual needs? After a decade of teaching pet owners how to make the right choice, I put the information into an eBook!
Dr. Moe’s lesson plan of myofascial exercises for dogs
(Please be sure to check with your dog’s veterinarian before starting any of the exercises below.)
Cookie stretches
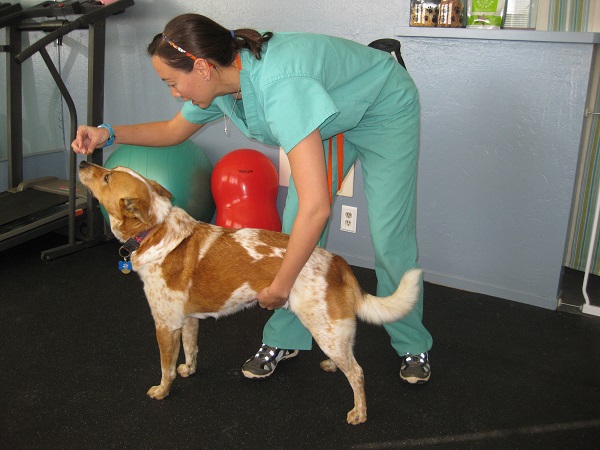
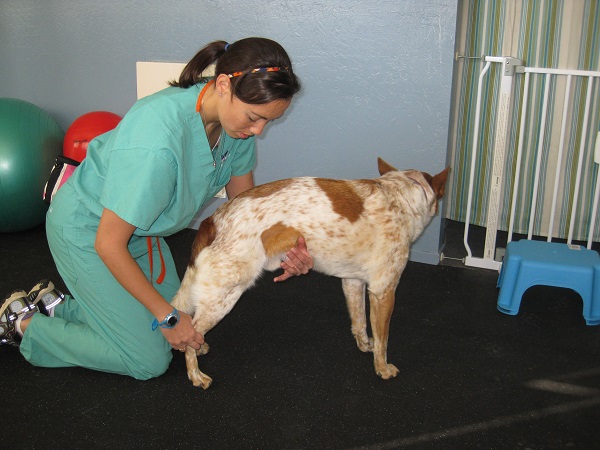
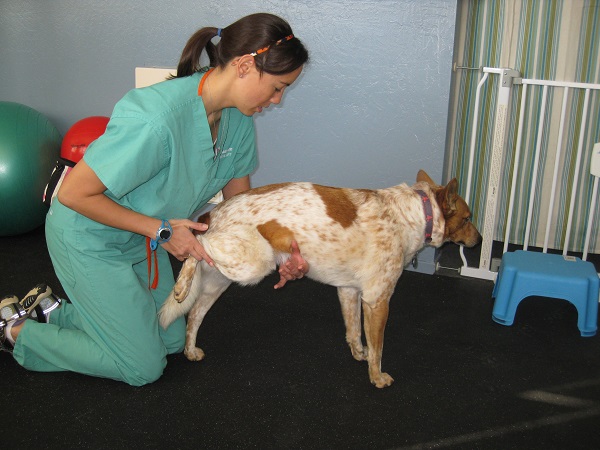
Cookie stretches can be done 5 times per side, 3 times a day. If your dog cannot stand, use a supported stand that’s demonstrated in the picture above.
- Cookies up – Have your dog reach above his head (look up) to get a treat. This will help to increase extension in the spine and weight bearing on the pelvic limbs, especially in dogs with IVDD.
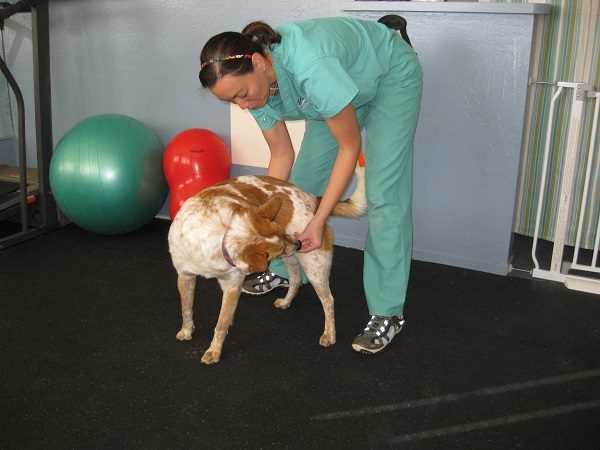
- Cookies at the hip – Have your dog take a treat from the hip area. You may need to place a hand on the other shoulder to prevent him from circling to get the treat. This is best done in standing. Repeat on the opposite side. This activity encourages rotation and side bending through the entire spine and strengthens the obliques.
Tailwork
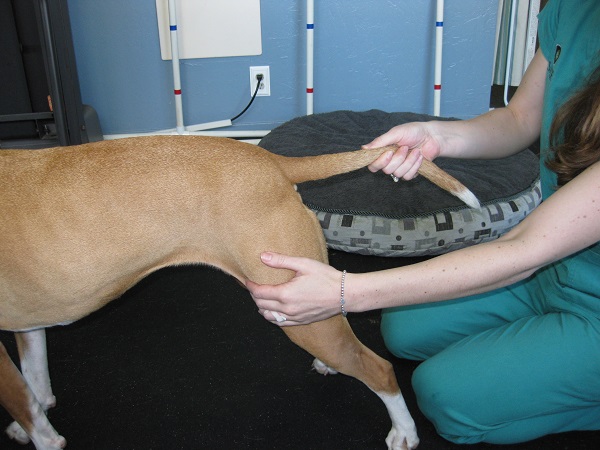
Rub firmly down the length of your dog’s tail. This will stimulate movement which will strengthen the muscles of his tail. It also helps stimulate weight bearing through the pelvic limbs. Combine this with any standing activities.
Tail traction
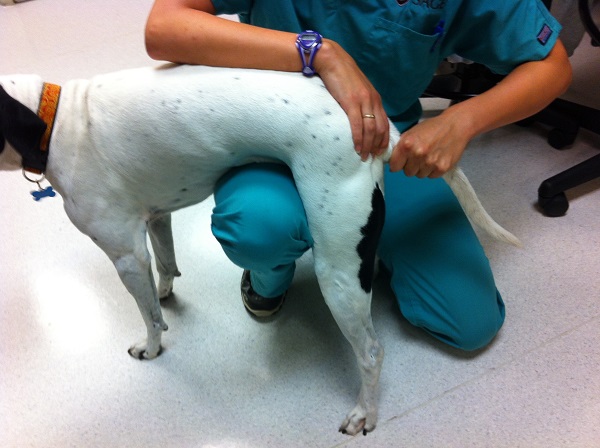
This is best to do when your dog is in a relaxed state. S/he can be lying down on either side, or standing to perform traction. Use one hand to stabilize the pelvis above the tail, and the other hand will grasp the base of the tail. Very gently pull to take out the slack in the tissues – stop when you feel slight resistance and hold for 5 minutes. You may feel a slight give – take up the slack and hold at the next “barrier”. This will help to create space between the vertebrae in the lower spine and relieve pressure on the intervertebral discs.

Get the Essential Guide
The Essential Guide of Products for Handicapped Dogs e-book is a labor of love for me. I wrote it to answer your most pressing questions about where to find the best products for your wheelchair dog. You’ll find products you didn’t know existed and each will improve your dog’s quality of life. Print a copy and keep it by your side.
Withdrawls
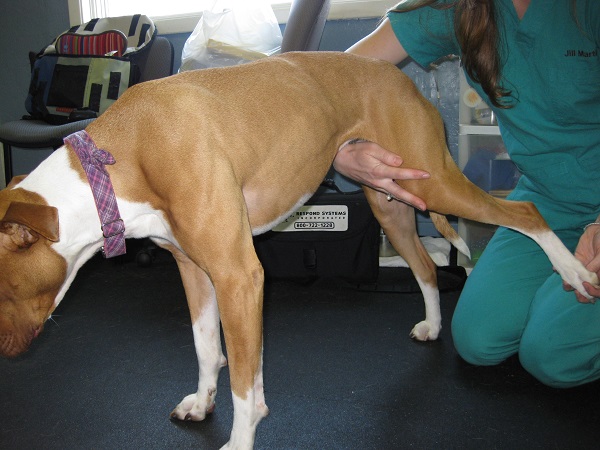
While your dog lies on her side, extend her hind leg back and rub/pinch the webbing between her toes. Make sure you use the pads of your fingers – it should be annoying, but not painful.
This will cue her to pull her leg up and away from you – follow her leg up and compress her leg to flex through the bottom of her foot. The activity elicits a reflex but also works to maintain strength in your dog’s hip, knee, and ankle flexors. Repeat 10 times, 3 times per day (each side).
You can also do this in a standing position to replicate an exaggerated step. Support her at the waist and bring her leg back into extension – pinch between the toes and follow through with the step.
Patterning in standing
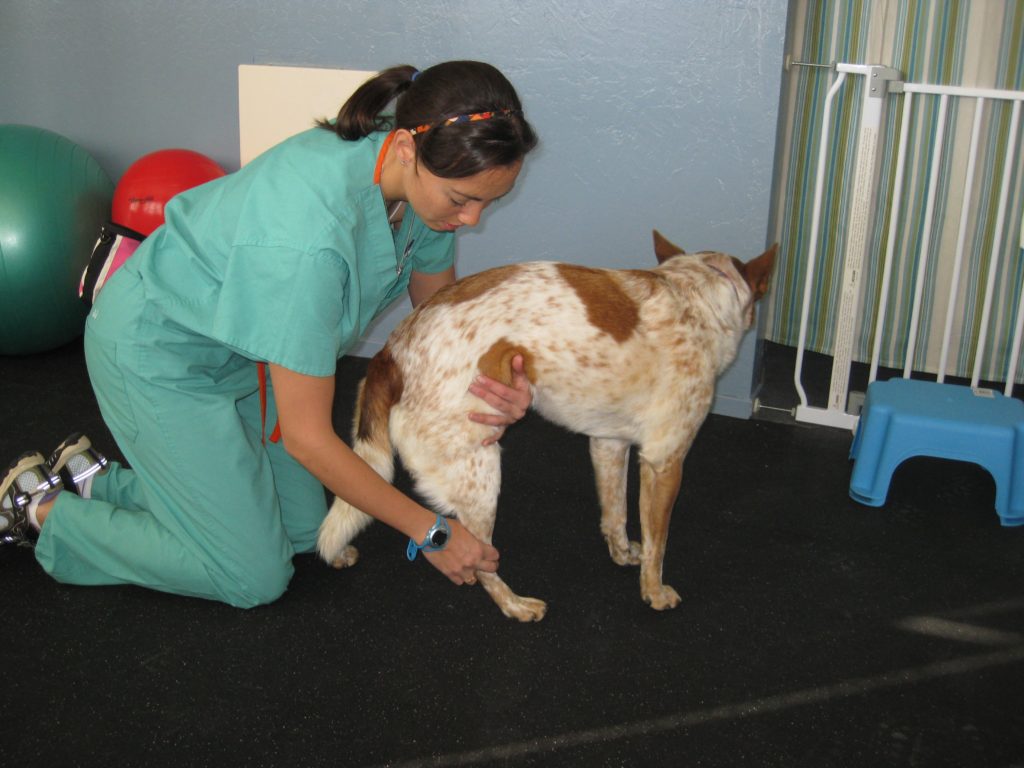
Position your dog in a regular standing position with light support for balance with your arm under the waist. Slide the hind foot backwards until s/he lifts it – help them place it just in front of the hip (where s/he would normally place it).
Gently push down as you slide the foot back – this provides important sensory input through the pads in order to remind your pet where the feet are in space. Repeat this 10 times. This will help the dog place the feet appropriately, not out to the side or crossed, when s/he walks. Repeat on the other side. Please do this exercise 2-3 times per day, especially before walks.
Want to read more about physical therapy for dogs?
Note: Some of the links in this article are affiliate links. As an Amazon Associate, I earn from qualifying purchases.
9 Dog Physical Therapy Exercises You Can Do at Home



Leave a Reply